Azure Pipelines as build system for GitHub
devops vsts github
November 6, 2018
While it is possible to create public repositories for free with Azure DevOps (recently renamed from Visual Studio Team Services), it's still true that GitHub is the developer's social network. I personally prefer GitHub for public, community driven and open-source work, and Azure DevOps for private projects.
This article is about setting up the build and release pipeline for GitHub using Azure DevOps.
Outline:
- Background
- Build
- Building .NET Core console app
- Trigger
- Multi-configuration build
- Release
- Considerations
Background
When I was getting ready to make my Azure Speech CLI tool public, I was thinking about a way how to provide compiled builds to developers who don't necessarily have the need to clone the repo, fire up Visual Studio (or .NET CLI) and build it themselves. Inspired by Bot Framework Emulator I decided to use GitHub Releases for this.
The goal was to host source code on GitHub and automatically build every code commit / pull request, increase version number and occasionaly produce new version as GitHub tagged release. Build should be done for two platforms: Windows and macOS.
GitHub itself doesn't offer the possibility to run automated builds, which opens the door for other systems - such as Visual Studio Team Azure DevOps.
Build
First you need to create an organization in Azure DevOps and then a project. Both of those are free, just go to https://dev.azure.com and click Start free.
I chose that I want my project to be public. But that's up to you.

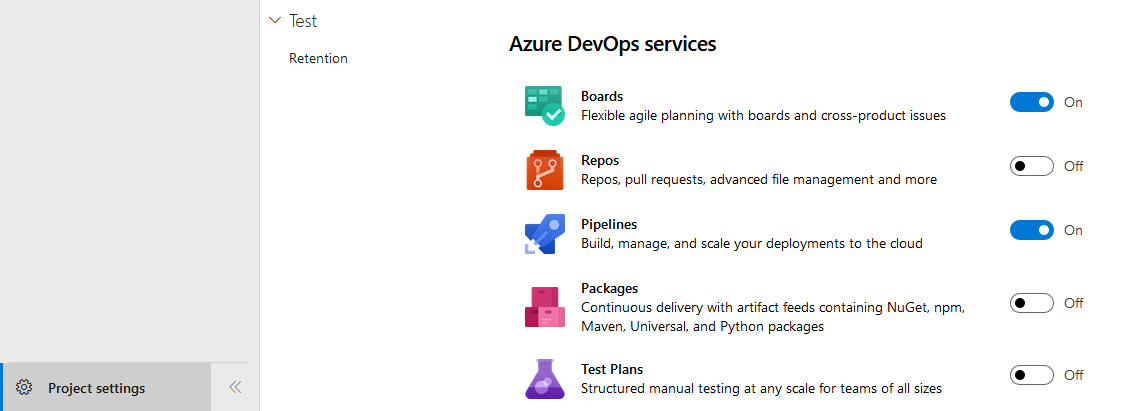
Once the project is created, you can hide parts you will not be using by clicking Project settings at the bottom of the screen and then picking Azure DevOps services:
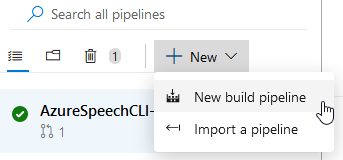
Then go to Pipelines and Builds, click + New and select New build pipeline.
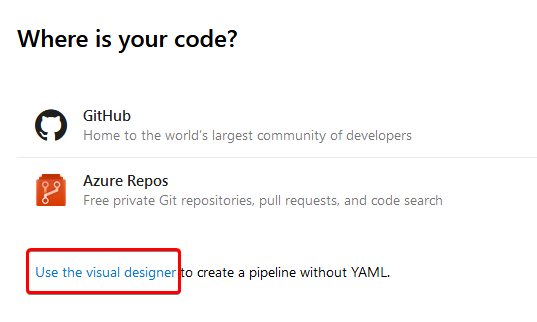
I prefer the visual designer to YAML, so when the portal asked me, I clicked Use the visual designer.
Change source location to GitHub and you will be presented with an info box saying that Azure DevOps needs your authorization. In order to set proper hooks, you need to give the service appropriate permissions.
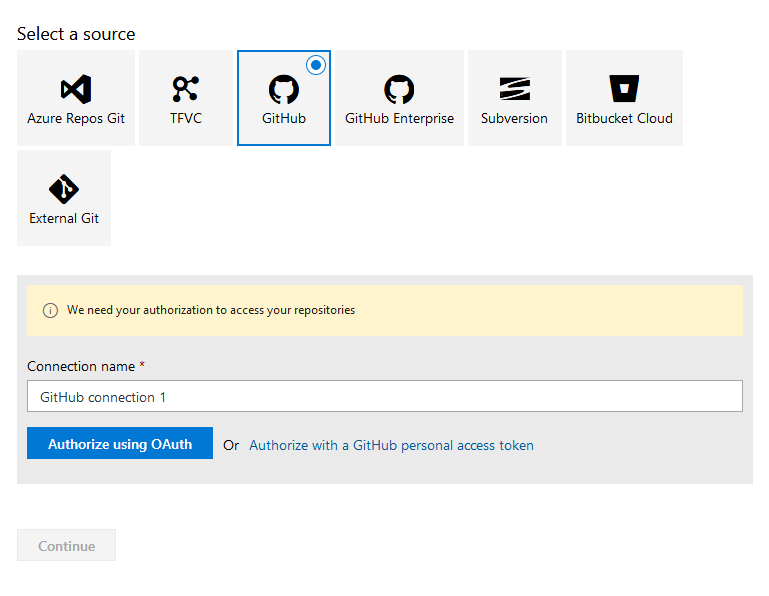
I usually have problems with OAuth due to mixing various accounts from different tenants, so I went with the GitHub personal access token, but if OAuth works for you, just use it - it's easier.
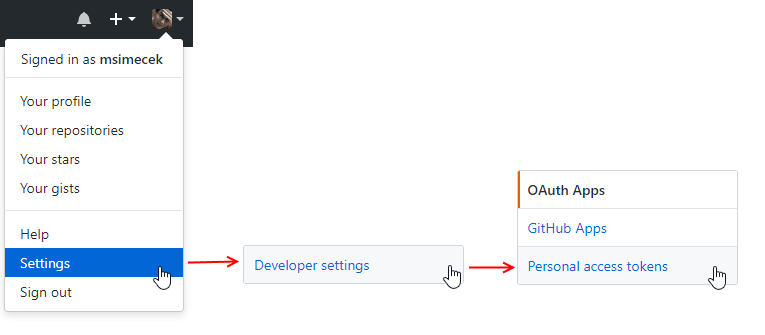
For us, who follow the difficult path :), let's go to GitHub, click our profile picture and select Settings.
In Developer settings there is a section called Personal access tokens.
In the scopes section, you shouldn't select all checkboxes (although it's tempting and convenient). Instead make sure to check at least admin:repo_hook (both write and read) and I've added repo/public_repo, just to be sure.
Once you save the token, you need to copy it. This is the last time you see it - once you leave or refresh the page it will be hidden.
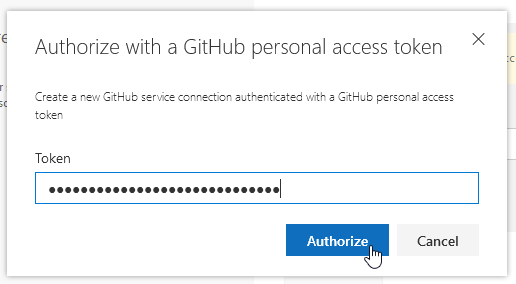
Finally, back in Azure Devops, select Authorize with a GitHub personal access token and paste your token into the box.
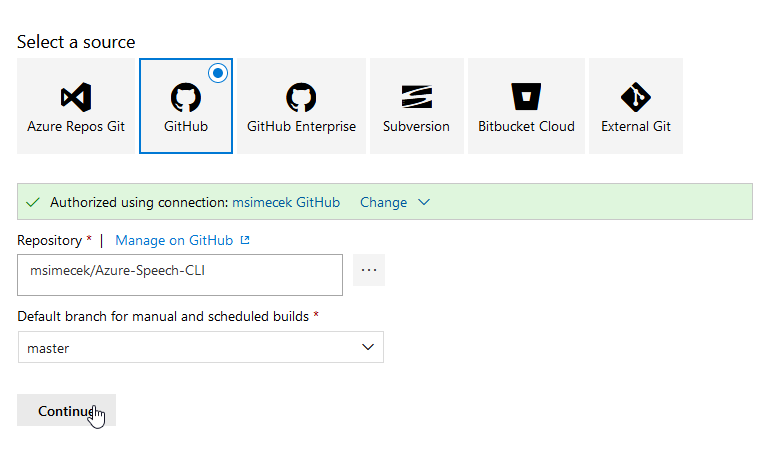
Then pick your repo, select default branch (I chose master) and hit Continue.
Azure Pipelines offer a nice selection of build templates, but unfortunately none of them is suitable for this project (it's a .NET Core console app). Let's click Empty job and start lining the pipes.
I'm usually running my pipelines on Hosted VS2017 agent pool, because these machines have most of the prerequisites (SDKs, runtimes etc.) preinstalled.
Building .NET Core console app
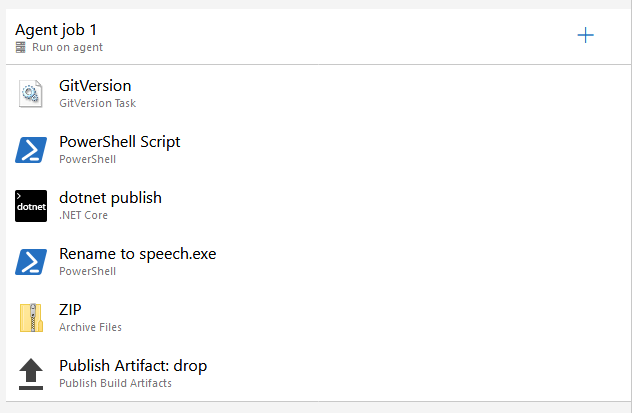
In theory it's very easy to build .NET Core app in Azure Pipelines - just add the .NET Core step, change it to publish and be done with it. Reality is more complex though. My pipeline is doing the following:
- Calculate version string based on tag, semantically, using GitVersion (available from the Marketplace).
- Update version in the CSPROJ file, using PowerShell.
- Generate self-contained binaries, using .NET Core CLI.
- Rename SpeechCLI executable to speech, using PowerShell.
- Archive results as a ZIP file and publish to artifact drop.
A few notes:
I don't let GitVersion Update AssemblyInfo files, because it's not able to find them for .NET Core application.
I use this inline PowerShell script instead:
(Get-Content $(Build.SourcesDirectory)\SpeechCLI\SpeechCLI.csproj).replace('<Version>(.+)</Version>', '<Version>$(GitVersion.SemVer)</Version>') | Set-Content $(Build.SourcesDirectory)\SpeechCLI\SpeechCLI.csproj
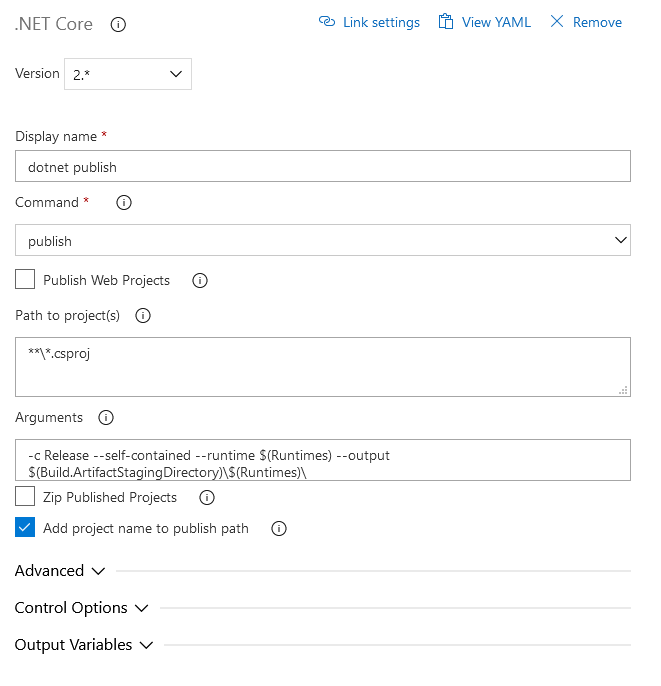
The publish step is producing self-contained binaries. Here are the Arguments I'm using:
-c Release --self-contained --runtime $(Runtimes) --output $(Build.ArtifactStagingDirectory)\$(Runtimes)\
Notice the $(Runtimes) bit? We'll get to it in the Multi-configuration build section. Also notice that the Zip Published Projects checkbox is not checked. That's intentional.
Rename is just another PowerShell inline script - for convenience, I'm renaming produced executables to speech:
If ("$(Runtimes)" -eq "win-x64") {
Rename-Item $(Build.ArtifactStagingDirectory)\$(Runtimes)\SpeechCLI\SpeechCLI.exe speech.exe
}

if ("$(Runtimes)" -eq "osx-x64") {
Rename-Item $(Build.ArtifactStagingDirectory)\$(Runtimes)\SpeechCLI\SpeechCLI speech
}
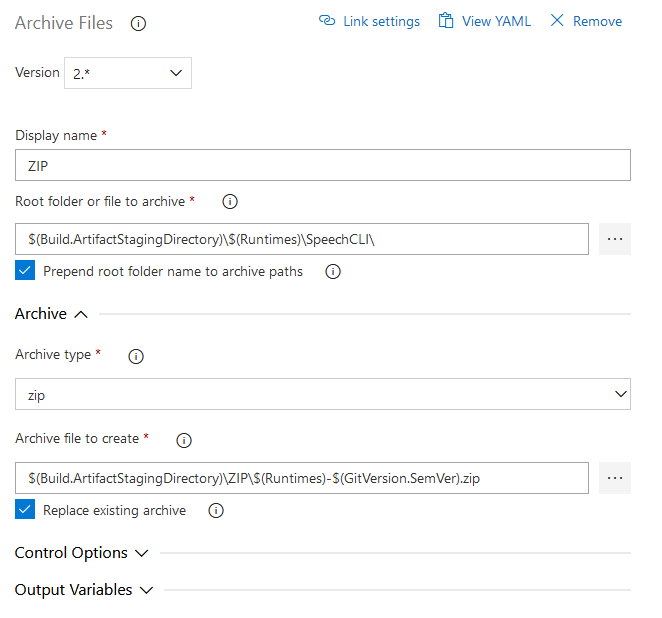
And finally, the ZIP step creates an archive from the folder that was created during publish.
Root folder:
$(Build.ArtifactStagingDirectory)\$(Runtimes)\SpeechCLI\
Archive file to create:
$(Build.ArtifactStagingDirectory)\ZIP\$(Runtimes)-$(GitVersion.SemVer).zip
When it comes to publishing artifacts, only the ZIP folder gets published. This makes sure that only ZIP files will eventually appear on GitHub.
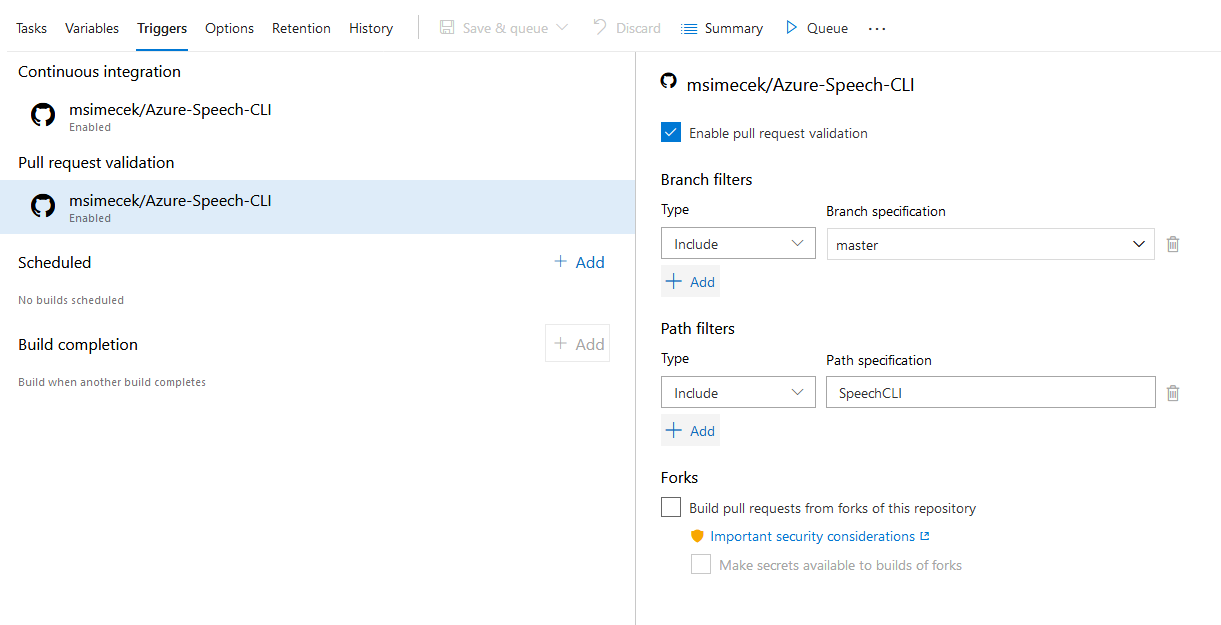
Trigger
There are two triggers set up for this pipeline: Continuous integration and Pull request validation. Every time there's push to the master branch, Azure DevOps triggers a build. The same happens every time someone creates a pull request through GitHub.
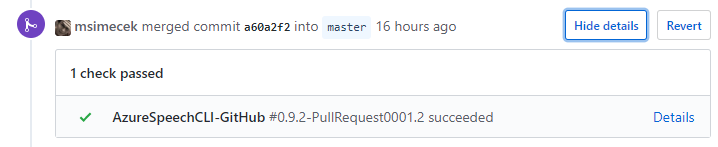
It even shows as PR check on GitHub:
And if you look at your repository's settings, you will see two new webhooks:

Multi-configuration build
Let's remember one of the requirements: I wanted to build my application for both platforms (Windows and Mac) and serve binaries to users.
It would be possible to just duplicate two series of steps and reach every platform supported by .NET Core, but if we look closely at the differences, it's clear that the main thing changing is the runtime identifier (win-x64 and osx-x64 in my case. The rest of them can be found in Docs).
Azure Pipelines support multi-configuration builds - you can set a series of values and it will trigger the build for all of them. If you specify that you want to run on several agents in parallel, if will be completed faster.
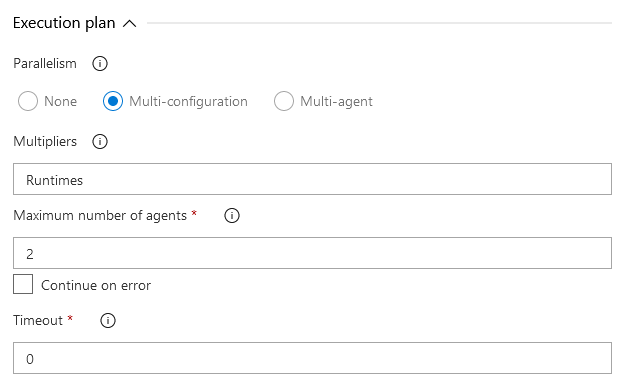
To set it up first go to your build pipeline, select agent job, scroll down to Execution plan, change Parallelism to Multi-configuration and specify Multipliers - name of the variable which holds all possible values. Then select maximum number of agents (I'm building for two platforms, so 2 is fine).
Next you have to go to Variables and define values. My variable is called Runtimes and values are comma-delimited: win-x64, osx-x64.

You can then reference this variable like any other: $(Platforms).
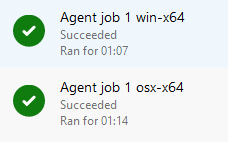
Each build will now run in parallel, using 2 build agents - one per platform.
Release
Half of the pipeline is done - application has been built, executables with supporting DLLs produced and everything ZIPped. Now to get it to GitHub.
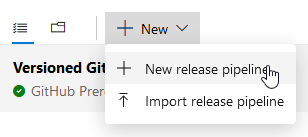
In the terminology of Azure DevOps we're talking about Release pipeline. Let's go to Releases then and create new pipeline:
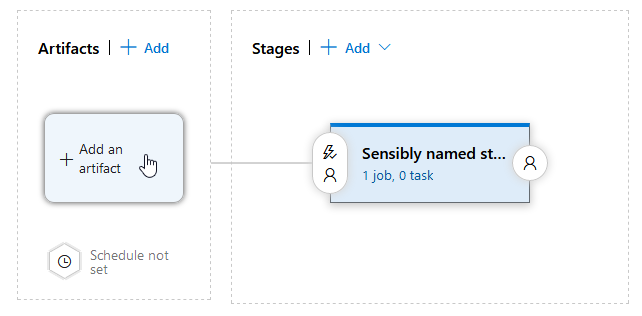
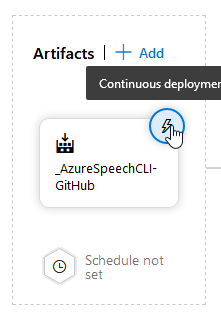
Begin with an empty job again, name a stage sensibly and then forget about it for a moment. Click Add an artifact and select an artifact from your previously defined (and ran) Build.
If you want the release to be triggered automatically, you can configure continuous deployment. That wasn't my case, because I wanted to curate every release to GitHub myself.
Now back to the stage, let's define some tasks:
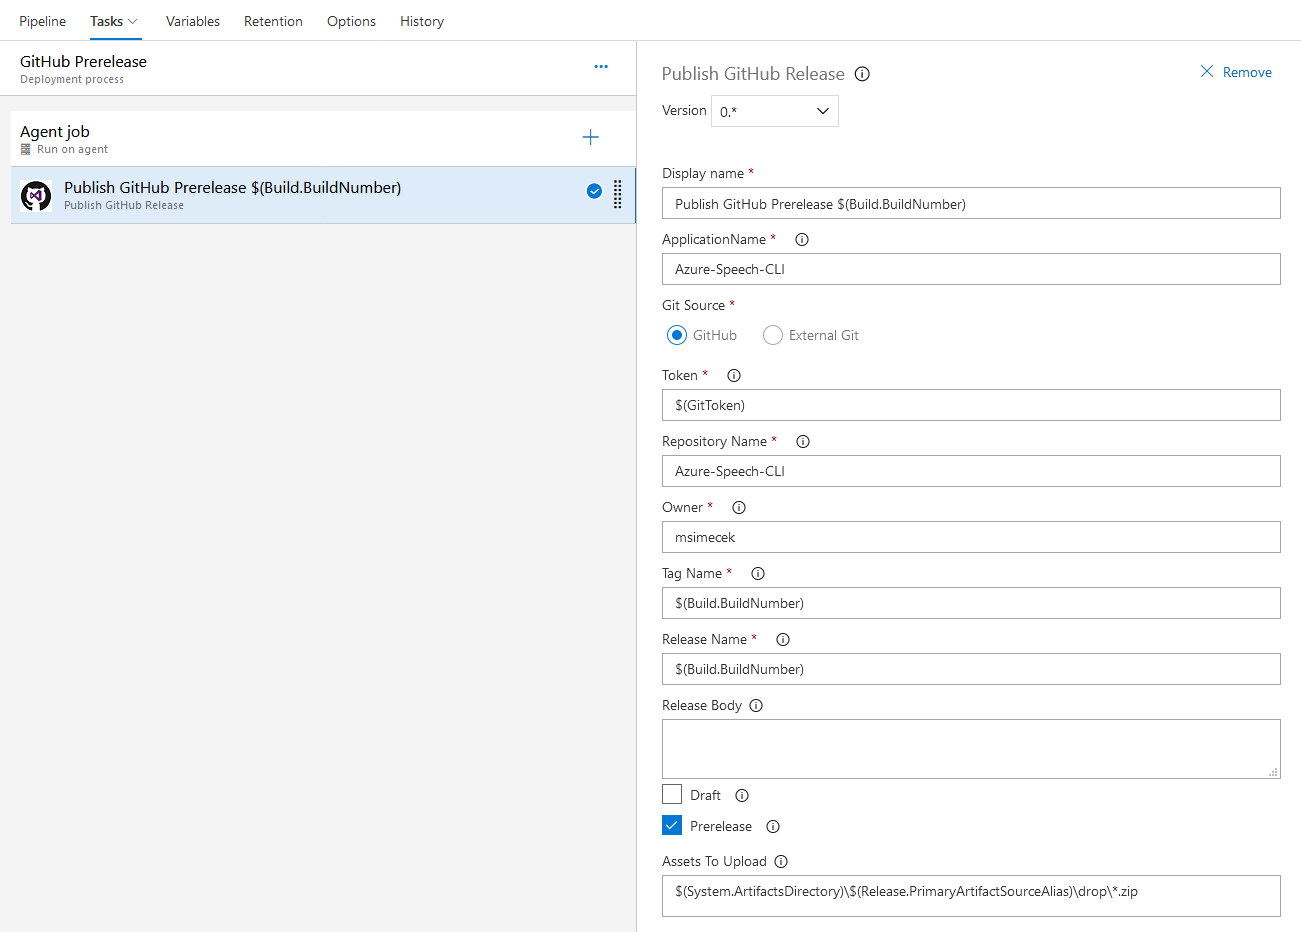
There's only one: Publish GitHub Release. It's not provided by Microsoft, but if you search for it, it will pop-up.
- It's using GitHub token again (I created new one, but it should be fine to just extend scope for the previous one).
- ApplicationName should not contain spaces (learned the hard way :) ).
- Repository Name is the same as the repo on GitHub.
- Tag Name can be specified on release but can also be generated automatically (I used
$(Build.BuildNumber)which is the SemVer string coming from build). - Assets to Upload are stored in:
$(System.ArtifactsDirectory)\$(Release.PrimaryArtifactSourceAlias)\drop\*.zip(wildcard supported). - And this particular definition applies to Prerelease.
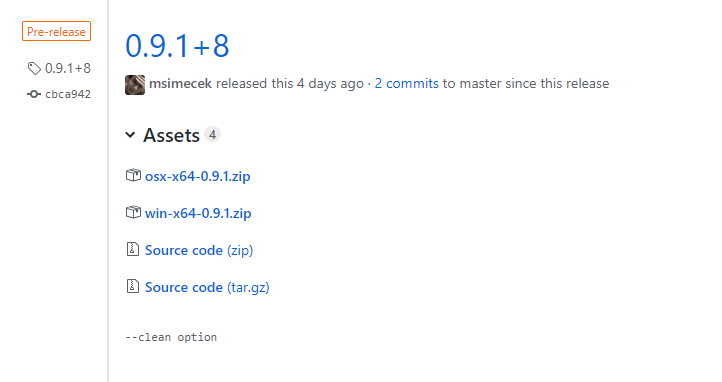
This release definition takes all ZIP file artifacts from build and sends them to GitHub with a new Tag.
Considerations
I realize that my versioning system is not optimal. It's now tag-based with the SemVer generated strings, without additional configuration. I will continue to investigate into how to make the "version bump" better and more systematic (such as increasing once in the build step and propagate back to repo and forward to release)... Let me know if you have any suggestions ;)
Feedback
Found something inaccurate or plain wrong? Was this content helpful to you? Let me know!
📧 codez@deedx.cz