Flushing Redis Cache from Azure DevOps
azure-devops redis
Emptying Redis from DevOps is not as easy and straightforward as it initially seems. This article describes how to use Azure CLI and ncat to communicate with the server directly and send RESP commands.
May 17, 2020
In a recent customer project we were building Azure DevOps (ADO) Release pipelines which deployed an updated Linux container to Azure Web Apps and since updates to this container usually meant changes to cached user paths at a website, we needed to invalidate/empty/flush Azure Redis cache.
What was our surprise when we discovered that there's no easy way in ADO to this - no first-party task, no easy Azure CLI command. So we dug deep into ncat and Redis console commands and this was our solution.
tl;dr
Use Azure CLI and ncat (from nmap) to send Redis RESP commands.
{ echo -e "*2\r\n\$4\r\nAUTH\r\n\$$key_length\r\n$primary_key\r\n*1\r\n\$8\r\nFLUSHALL\r\n"; sleep 1; } | ncat --ssl myredis.redis.cache.windows.net 6380
The problem
How to invalidate (flush) Azure Redis cache from Azure DevOps release pipeline using a command line?
The solution
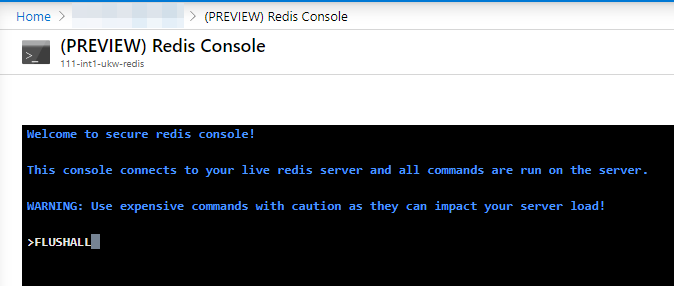
Redis service in Azure is nothing special in terms of functionality - you can use regular libraries and SDKs to work with it. What's nice is that it supports Redis management commands (RESP protocol) and you can do something like:
FLUSHALL
directly from the Azure management portal.
How to do the same thing from Azure DevOps pipeline?
Unfortunately, redis-cli doesn't support TLS connections, so we couldn't use that. Instead we went to lower levels and piped RESP commands to ncat.
The process is this:
- Use Linux-based build agent.
- Install nmap from apt.
- Get Redis primary key using Azure CLI.
- Use ncat to authenticate to Redis (AUTH) and flush cache (FLUSHALL).
All can be done with one Azure CLI task in the Inline script mode. We used version 2.*.

This is the script:
sudo apt update
sudo apt install -y nmap

# Azure CLI is used to fetch Redis key.
primary_key=$(az redis list-keys -g mygroup -n myredis --query primaryKey -o tsv)
# Azure DevOps Task Groups detect $ ( as variable, so we use a dirty echo > /dev/null hack to prevent it.
# 'environment' is a variable that exists in the pipeline
key_length=$(echo -n $primary_key | wc -m && echo $(environment) > /dev/null)

# Feeding commands from stdin to ncat - if ever changed, length needs to be recalculated.
{ echo -e "*2\r\n\$4\r\nAUTH\r\n\$$key_length\r\n$primary_key\r\n*1\r\n\$8\r\nFLUSHALL\r\n"; sleep 1; } | ncat --ssl myredis.redis.cache.windows.net 6380
There are a few magical tricks in this script:
- Key length is the number of characters of the key string. Azure DevOps considers $(somethng) as variable and tokenizes it before running the script. To break this behavior, real variable must be used inside the $(...) block. That's why we just
echo $(environment)to/dev/null. - To communicate with the server we used ncat which supports SSL and is able to connect to Azure Redis cache.
- RESP is not easy to compose, but we were able to create the command thanks to an article by DJ Walker-Morgan.
*2indicates that there are two commands\r\n- every segment is delimited by carriage return and newline$4is the number of characters in the command (for AUTH = 4, for FLUSHALL = 8 and for primary_key = key_length) and it has to be escaped (\$4), otherwise the shell would try to expand it as a variableecho -eprevents the interpretation of\nin the string
That's it. Successful run prints just two +OK messages in the console output (one for AUTH, the other for flush):

Feedback
Found something inaccurate or plain wrong? Was this content helpful to you? Let me know!
📧 codez@deedx.cz