Speech transcripts from local machine
speech
How to serve audio files for Azure Speech batch transcription from local machine by using http-server and Ngrok.
July 3, 2019
Azure Speech Service offers the ability to send longer pieces of audio (such as phone call recordings, video recordings etc.) to the batch transcription endpoint and after a while get text representation of this audio. Source files are usually provided through Azure Blob Storage, because they need to be available online and the service proactively downloads them.
But for development and smaller amounts of data it might be tedious to upload everything to Storage and it might be convenient to host files from local machine directly.
tl;dr
This post describes how to serve audio files for Azure Speech batch transcription from local machine by using http-server and Ngrok.
- Use http-server NPM package or dotnet-serve to create a HTTP server from filesystem.
- Use Ngrok to tunnel to this HTTP server from the internet.
- Create batch transcription with recordings URL pointing to Ngrok URL.
How to
All audio files are in folder on the computer.
To make them accessible over HTTP I'm using http-server from NPM.
cd C:\here\are\my\files
http-server
Starting up http-server, serving ./
Available on:
http://10.92.118.122:8080
http://127.0.0.1:8080
http://192.168.121.113:8080
Hit CTRL-C to stop the server
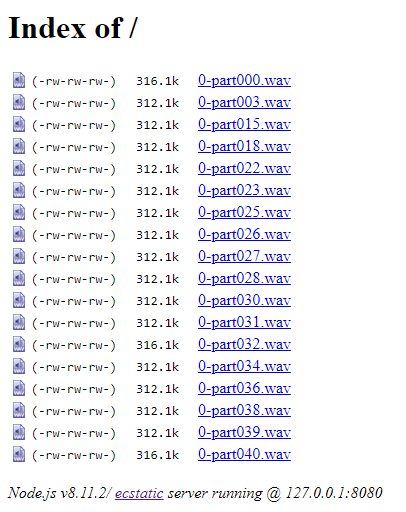
Browsing to http://localhost:8080 shows directory listing (can be disabled with the -p false parameter):

There's also a global tool in the .NET world called dotnet serve.
Next step is to make this local server available to the internet. My laptop doesn't have a public IP address, so I use Ngrok to tunnel requests from the internet to localhost:
> ngrok http 8080
ngrok by @inconshreveable                              (Ctrl+C to quit)
Session Status                online
Account                       Martin Simecek (Plan: Free)
Version                       2.3.30
Region                        United States (us)
Web Interface                 http://127.0.0.1:4040
Forwarding                    http://4e5c0c04.ngrok.io -> http://localhost:8080
Forwarding                    https://4e5c0c04.ngrok.io -> http://localhost:8080
You will get both HTTP and HTTPS URLs accessible from the internet and pointing to your localhost. Once you quit Ngrok, these will be released and you will get new addresses next time.
You can now provide Ngrok URL with filename to initiate speech transcript. I'm using the Speech CLI to create transcription with -w parameter to wait for completion.
> speech transcript create --name ngroktest --locale en-us --recording https://4e5c0c04.ngrok.io/0-part000.wav -w
Creating transcript...
Processing [......
In a few seconds you should see a GET request coming first to Ngrok and then http-server. That's the Speech service downloading your file for processing.

..................] Done
7e5e92b6-e45c-4yd5-8d09-72b4c1408b48
Check for completed transcriptions and download results as TXT file:
> speech transcript list
...
> speech transcript download 7e5e92b6-e45c-4yd5-8d09-72b4c1408b48 -f TXT -o C:\transcripts
Feedback
Found something inaccurate or plain wrong? Was this content helpful to you? Let me know!
📧 codez@deedx.cz